Flashing stock firmware onto a Samsung Galaxy S9+ (SM-G965F) on Ubuntu 18.04 using Heimdall
Samsung stock Android.
On the way back from London last week, I picked up an unlocked, EU region Samsung Galaxy S9+ to install LineageOS on.
When I got back, I proceeded to install the July 3rd nightly build and everything was good until I tried the camera app and it kept hanging. Apparently, this is a known issue and a “won’t fix” as far as the LineageOS folks are concerned as it can be resolved by updating the stock firmware. Which, of course, means that you have to install said firmware again.
(Lesson learned: before installing a different operating system, make sure you update your phone to the latest official firmware to potentially save yourself some trouble.)
Adventures in firmware
To complicate things, Samsung UK doesn’t make the firmware for its phones available on the S9+ support site. When I reached them for help via DM on Twitter, they very nicely told me where I could stick my new €1,000 phone because I had had the audacity to install a different operating system on it than the dark-pattern-ridden spyware/bloatware that it came with. Thanks, folks, great customer service! (Every day that passes, I’m thankful that Todd and the lovely folks at Purism are working on full-stack freedom with their computers and upcoming phone.)
Samsung’s reluctance to offer system restoration firmware for download means that a cottage industry, most of it rather shady, has popped up to fill the demand. Of the more reputable sites for information is XDA Developers and that’s where I found the firmware for my S9+.
(Again, Samsung, you are failing your customers and potentially opening them up to security issues by not making the firmware available on your site. Please reconsider. The folks on XDA and SamMobile get it from you somehow and you know this is happening so why not “legalise” it so that people know they’re getting the real deal and don’t end up installing trojans and backdoors on their devices and end up making both themselves and the rest of us less safe.)
That all said, finding the firmware was only the beginning of the journey.
Here are the other steps I had to follow to install said firmware.
Flashing with Heimdall

Heimdallr brings forth the gift of the gods to mankind (1907) by Nils Asplund
These instructions are for the Samsung S9+ (SM-G965F), EU region, unlocked, using the stock firmware linked to from the “Official Stock Firmware Thread for S9+ (SM-G965F) on XDA. Furthermore, they assume that you are carrying out the flashing using Heimdall (son of Odin), on a computer running some variant of Debian so you can use the excellent apt package manager. I’m currently running Pop!_OS 18.04 which is based on elementary OS/Ubuntu.
These instructions are specific to my unique setup. You might have to adapt them to yours. Flashing firmware carries the risk of potentially bricking your device. Needless to say, proceed at your own risk.
-
Install Heimdall:
sudo apt install heimdall-flash -
Install lz4 (you will need this later to uncompress files):
sudo apt install liblz4-tool -
Unzip all the files from the firmware file (which, in my case, is called G965FXXU1BRF8.zip. This is a little like unpacking Russian dolls given that there’s a zip that contains tar.md5 files which contain lz4 files. The following commands will extract everything (this may take some time):
unzip G965FXXU1BRF8.zip -d firmware && cd firmware for f in *.tar; do tar xf $f; done lz4 -dm *.lz4 -
You should now have a bunch of files. The important ones end in .img and .bin. These are what we’re going to flash onto the partitions on your phone using Heimdall. If you want to jump right into doing that without understanding how we know how to map the files to the partitions, you can safely jump to Step 9 now. Otherwise, read on and learn…
-
To find out where we need to flash the various files we have, we need to ask Heimdall to inspect our phone and dump a Partition Information Table (PIT) file for us. To do this, first connect your phone to your computer via USB and boot the phone into Download Mode (hold down the power, volume down, and Bixby buttons - that’s the button on the top-right, along with the second and third buttons from the top on the left). When you see the Download Mode splash screen, press the Volume Up button as instructed to enter Download Mode.
-
Test the connection:
heimdall detect -
Dump the PIT file using Heimdall. (Note: your phone will reboot after this. Enter Download Mode again using the technique you learned in Step 5):
heimdall print-pit > phone.pit -
Open up phone.pit in a text editor and search for the names of the extracted files in Step 3 that end with .img and .bin. Note the corresponding Partition Name values as those are what you will be using in the next step as the names of the flags to the
heimdall flashcommand.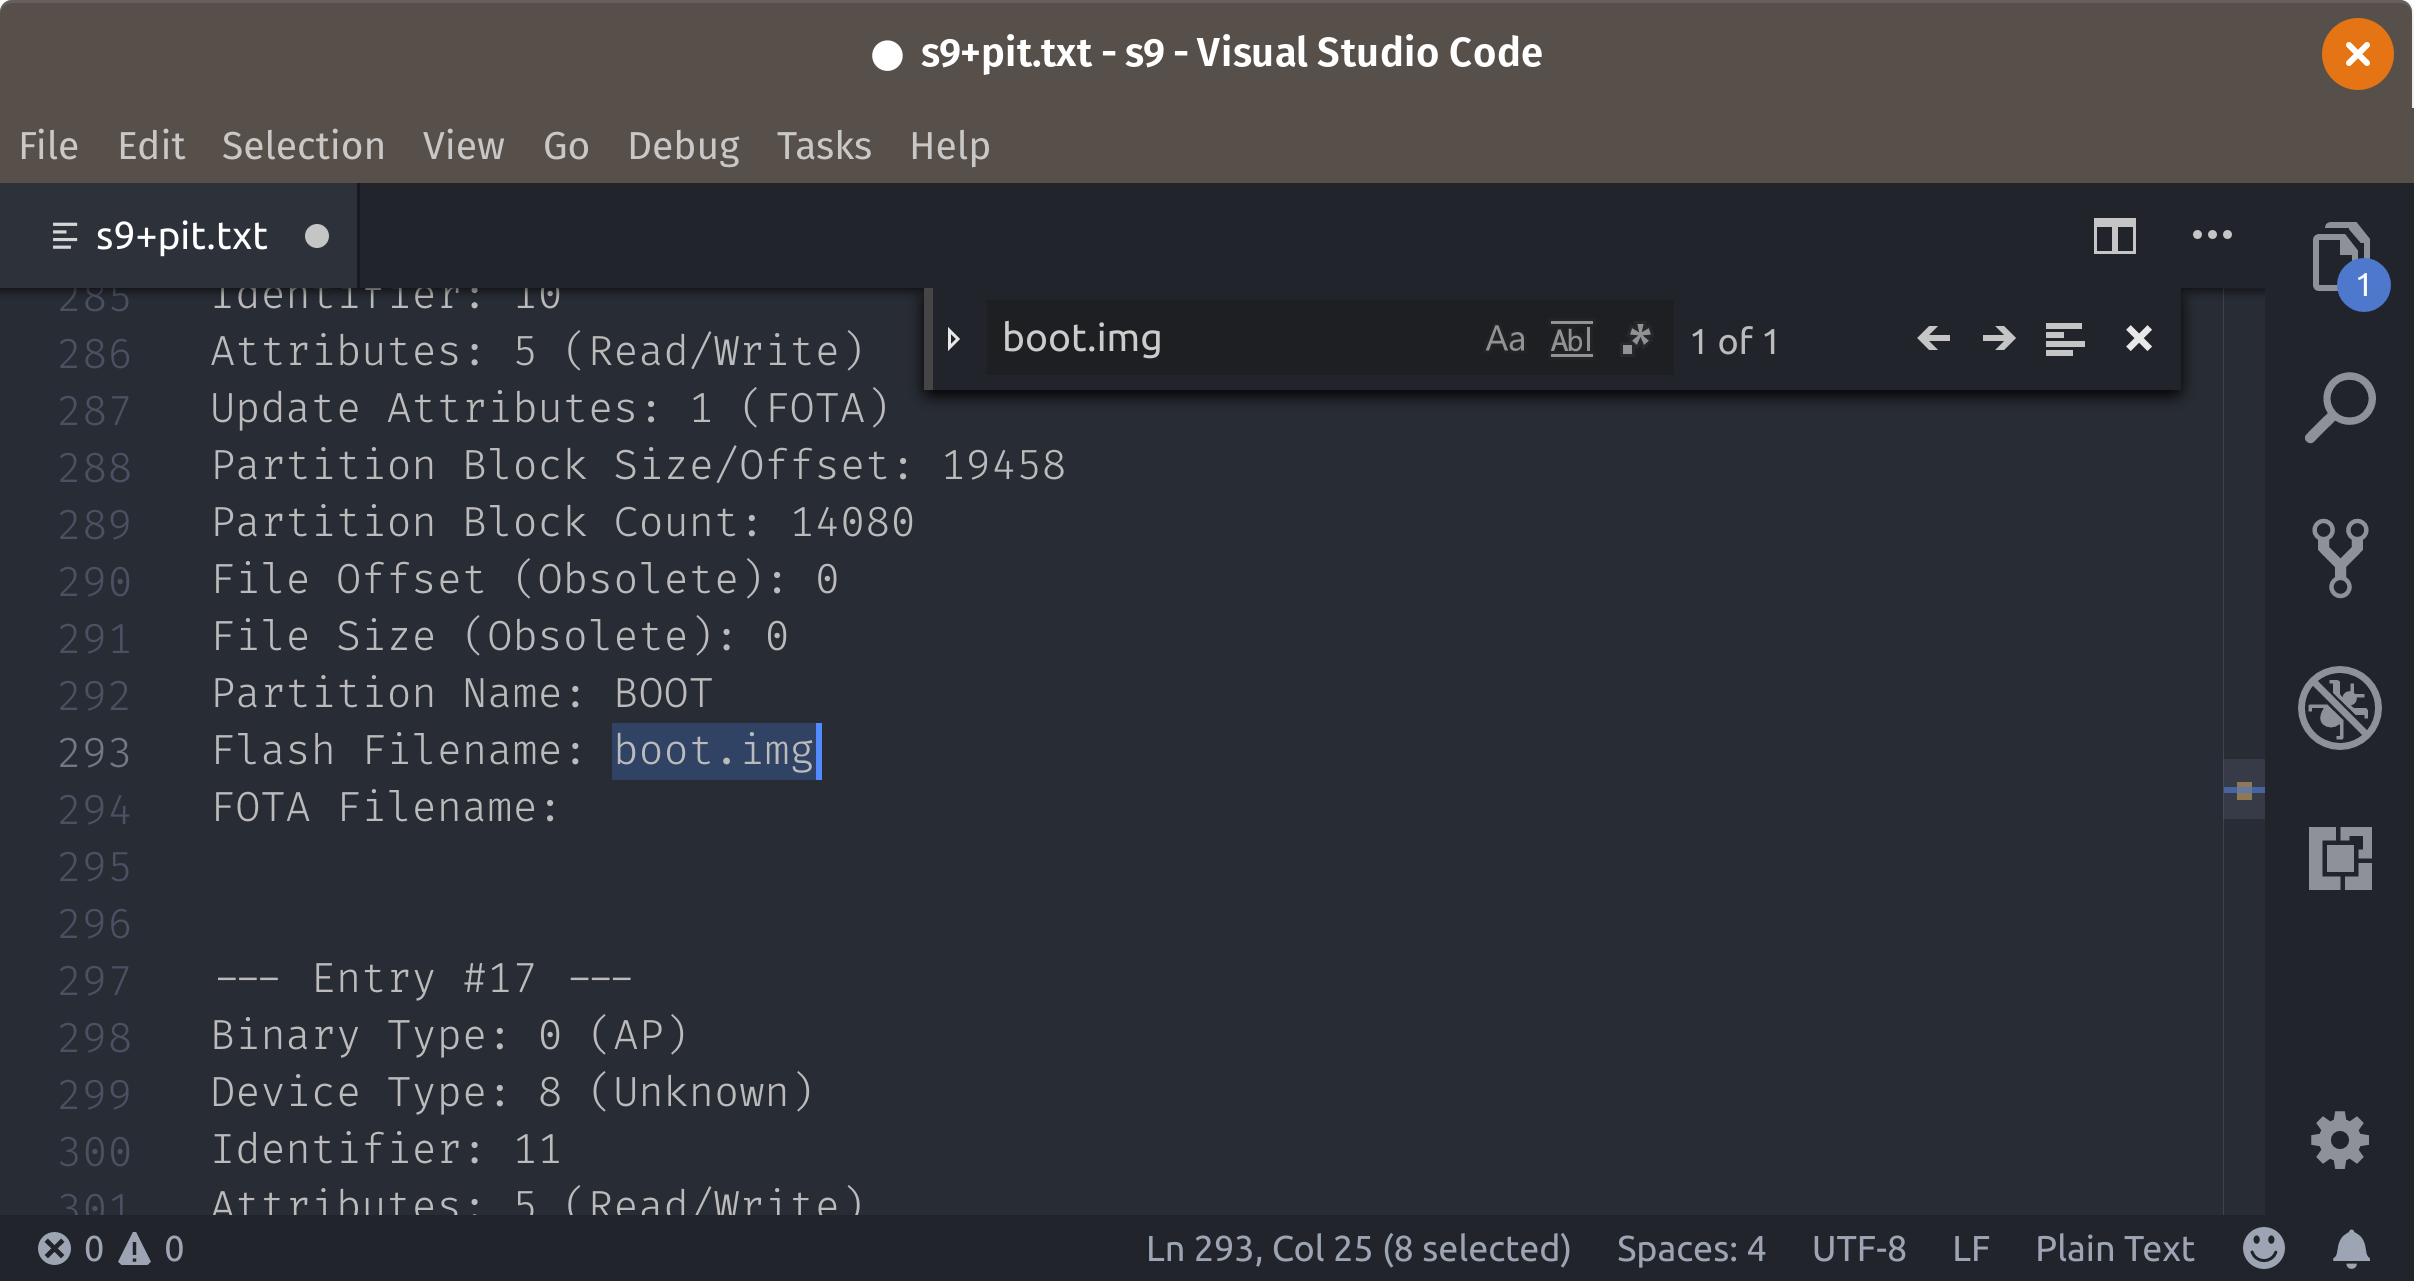
Partition name to image file name mapping.
-
Flash the firmware using Heimdall (your partition name -> flash filename mappings may vary. I’d highly recommend not skipping Steps 4-8 above and confirming that the mappings in your PIT file match before executing the following command):
sudo heimdall flash --BOOT boot.img --CACHE cache.img --CM cm.bin --DQMDBG dqmdbg.img --HIDDEN hidden.img --KEYSTORAGE keystorage.bin --RADIO modem.bin --CP_DEBUG modem_debug.bin --ODM odm.img --OMR omr.img --PARAM param.bin --RECOVERY recovery.img --BOOTLOADER sboot.bin --SYSTEM system.img --UP_PARAM up_param.bin --USERDATA userdata.img --VENDOR vendor.img
That should do it! (Whew!)
Your phone should restart and you may be dumped into a recovery screen (I was). Just unplug your USB cable and choose to reboot your phone and you should see the stock Samsung firmware boot up following a pulsating Samsung logo (this might take a little while). You should eventually be greeted with the “Hello!” screen and prompted to set up your phone.
This process is much more convoluted than it should be (due, in no small part, to Samsung’s lack of cooperation). I hope that this post makes it a bit easier to grasp and carry out.
A huge thank-you to everyone who documented their own experiences (see links above and references, below) and to Benjamin Dobell and Glass Echidna for Heimdall without which none of this would be possible.
Next up: I’ll be installing LineageOS again and hopefully have the camera work this time.